Tablet compression problems cost manufacturers time, money, and rejected batches. While many issues stem from formulation or granulation, a significant number are caused by — or worsened by — worn, damaged, or incorrectly specified tablet dies and punches. This guide covers the most common problems, their tooling-related causes, and practical solutions.
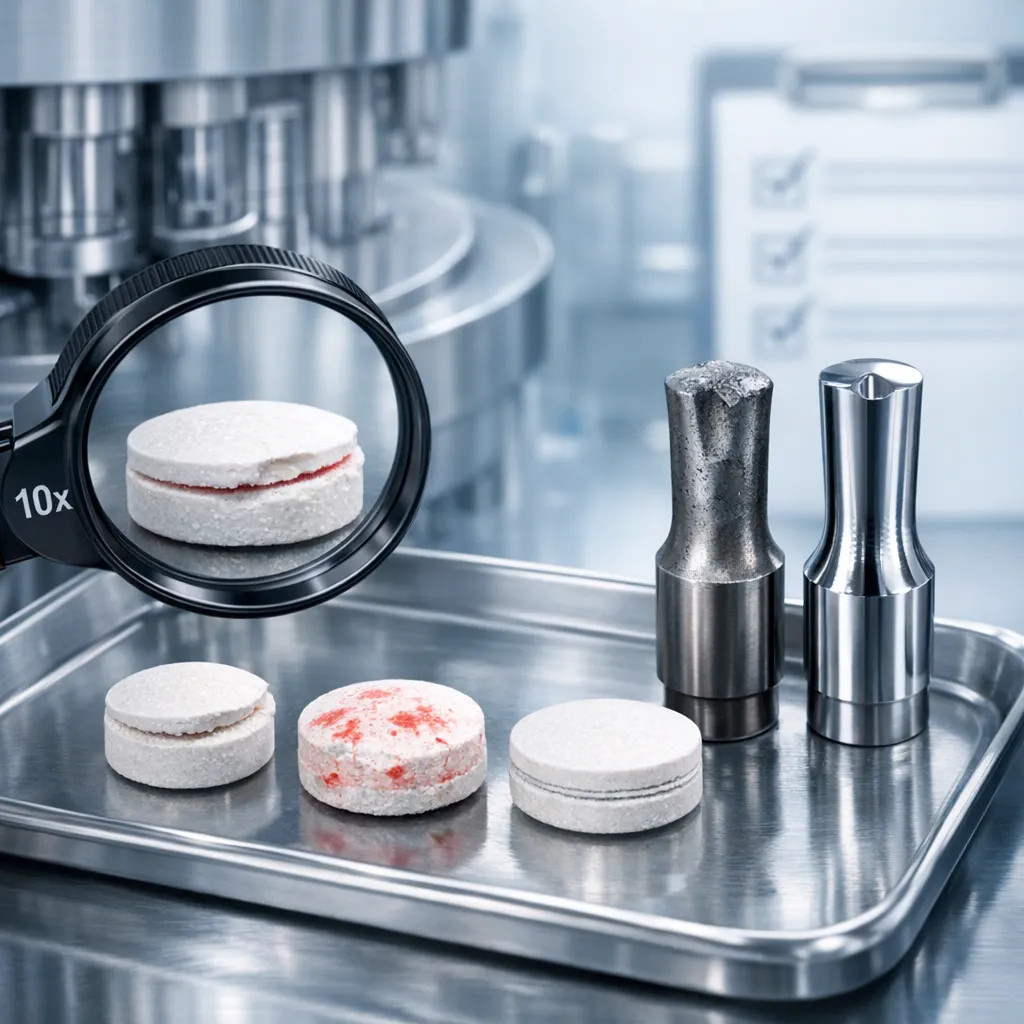
1. Capping
What It Looks Like
The top or bottom of the tablet separates as a cap, either during ejection or shortly after. The tablet splits horizontally.
Tooling Causes
- Worn or damaged punch tip edges — rounded edges create air entrapment
- Excessive punch tip concavity — deep cups trap air during compression
- Worn die bore — oversized bore allows powder to escape, creating weak tablet edges
Solutions
Inspect punch tips for wear and replace if edges are rounded or chipped. Consider shallower concavity if capping persists. Check die bore dimensions and replace worn dies. Use S7 steel for impact-resistant punch tips that maintain sharp edges longer.
2. Lamination
What It Looks Like
The tablet splits into horizontal layers through the middle, similar to capping but not at the top or bottom surface.
Tooling Causes
- Worn punch tips creating uneven compression
- Air entrapment due to worn die bores
- Excessive compression speed with worn tooling
Solutions
Replace worn punches and dies. Ensure all tooling in the turret is from the same batch with uniform wear. Consider pre-compression to expel trapped air. Use HCHC steel for longer-lasting punch tips that maintain consistent compression profiles.
3. Sticking and Picking
What It Looks Like
Sticking: powder adheres to the punch face, leaving a rough tablet surface. Picking: small amounts of material are pulled from the tablet, leaving pits — especially in engraved areas.
Tooling Causes
- Rough or pitted punch face surface from wear
- Corroded punch tips — rust and pitting create adhesion points
- Engraving too deep or with sharp internal corners on custom designs
Solutions
Polish punch faces to restore smooth finish. Replace corroded tooling — consider EMMKAY Special Steel for corrosion-prone environments. Apply anti-stick coatings (chrome, DLC, or TiN). For custom engraved tooling, ensure rounded internal corners during CAD drawing approval. See our coatings guide for details.
4. Weight Variation
What It Looks Like
Tablets from the same batch have inconsistent weights, failing uniformity tests.
Tooling Causes
- Worn die bores — different dies have different internal diameters, causing different fill volumes
- Inconsistent lower punch lengths from wear
- Mixed tooling from different batches or manufacturers
Solutions
Measure all die bore diameters and replace any out of tolerance. Check lower punch working lengths for consistency. Never mix tooling from different manufacturers in the same turret. Use HCHC steel for dies to minimize bore wear over time.
5. Hardness Variation
What It Looks Like
Tablets from the same batch have inconsistent hardness readings.
Tooling Causes
- Uneven punch tip wear across the turret
- Mixed tooling with different hardness levels
- Inconsistent punch head flat diameters affecting compression force distribution
Solutions
Inspect all punch tips for uniform wear. Replace the entire tooling set if wear is uneven — do not replace individual punches. Ensure all tooling is the same steel grade and from the same batch.
6. Chipping and Friability
What It Looks Like
Tablet edges chip or crumble during handling, coating, or packaging. High friability test results.
Tooling Causes
- Worn punch tip edges producing tablets with weak edges
- Worn die bore entry chamfer creating rough tablet edges
- Excessive clearance between punch tip and die bore
Solutions
Replace punches with worn tip edges. Check die bore entry chamfer and replace worn dies. Ensure proper punch-to-die clearance. Consider S7 steel for punch tips — it maintains sharp edges longer due to superior impact resistance.
Preventive Measures
- Inspect every batch — visual check of punch tips and die bores
- Weekly spot-checks — dimensional measurements on a sample of punches and dies
- Monthly full inspection — measure all tooling dimensions
- Proper storage — clean, oil, and store in a dry environment after each use
- Choose the right steel — match the grade to your formulation (steel grades guide)
For a complete maintenance routine, read our maintenance guide. To understand how worn tooling causes tablet defects, see our defects guide.
When to Replace Tooling
Replace your tablet dies and punches when tablet weight or hardness variation exceeds limits, visible wear appears on punch tips, die bore measurements exceed tolerance, sticking persists after formulation adjustments, or any chipping or cracking is found. Read our tooling lifespan guide for detailed replacement timelines.
Having compression problems? Contact EMMKAY INDUSTRIES — we can help diagnose whether tooling is the cause and recommend the right replacement.
Related Guides
Products and Standards